Install Codex CLI on macOS, Windows and Linux
Install Codex CLI via npm, Homebrew, or binary. Covers API key vs ChatGPT auth, config.toml, approval modes, sandbox levels, AGENTS.md, and MCP servers.
 Ofox
Ofox 
TL;DR: Codex CLI is one npm install -g @openai/codex away, but the install command is the easy part. The real surface area is ~/.codex/config.toml — model selection, three approval modes, three sandbox levels, MCP servers, and a per-project AGENTS.md that quietly shapes every prompt. This guide walks the full setup: choosing between npm, Homebrew, and the binary release; ChatGPT versus API key auth; the config file most quickstarts skip; and the routing trick to point Codex at OfoxAI or any other OpenAI-compatible provider when you do not want to pay OpenAI directly.
What Codex CLI Is Now
Codex CLI is OpenAI’s terminal-native coding agent. You type natural-language instructions, it reads your repo, plans, and edits files in place — like Claude Code, but wired to OpenAI’s Codex-tuned model line. The core is a Rust binary; npm, Homebrew, and the standalone installer are three ways to put the same binary on your PATH. Cold start is roughly a second and configuration lives in a real TOML file.
Three things matter for new installs:
- Do not hard-code a default model. The default tracks the release, so a version pinned in a blog post goes stale fast. Check
/modelinside a session for what your build actually loaded; OpenAI’s config-basic docs currently showmodel = "gpt-5.6"as the example value. For non-coding work — planning, doc rewrites, prompt tuning — switch with/modelrather than reinstalling. - Sandbox is on by default. Codex runs in
workspace-writemode out of the box, which means it can edit files inside your repo but cannot write to your home directory or run network-egress shells without approval. This is good. Do not turn it off because a tutorial told you to. - AGENTS.md is the leverage point. A short, specific AGENTS.md in your repo root changes the model’s behavior more than any
--modelflag.
For a side-by-side with the other terminal agents — Claude Code, Cursor, Cline — see our coding tools comparison.
System Requirements
| Requirement | Minimum |
|---|---|
| OS | macOS 12+, Ubuntu 20.04+ / Debian 10+, Windows 11 |
| RAM | 4 GB (8 GB recommended) |
| Node.js | Only for the npm path. @openai/codex 0.151.0 declares engines.node: ">=16" |
| Git | Optional, 2.23+ for the built-in PR helpers |
| Disk | ~80 MB for the binary |
| Auth | ChatGPT account (Plus/Pro/Business/Edu/Enterprise) or an OpenAI-compatible API key |
Two things in that table contradict what most install guides still say, including older versions of this one.
Node 22 is not a requirement. Run npm view @openai/codex engines and you get { node: '>=16' }. The core is Rust; npm only ships a launcher. If you use the standalone installer or the Homebrew cask, Node is not involved at all — a machine with no Node runtime installs Codex fine.
Windows is no longer WSL2-only. OpenAI’s README publishes a native PowerShell installer, and every GitHub release carries codex-x86_64-pc-windows-msvc.exe and codex-aarch64-pc-windows-msvc.exe — MSVC targets, not WSL builds. The npm package lists @openai/codex-win32-x64 and @openai/codex-win32-arm64 as optional dependencies for the same reason.
Worth knowing before you file a bug: the repo’s own docs/install.md still lists “Windows 11 via WSL2” in its system-requirements table while the README one directory up hands you install.ps1. The docs contradict each other. The binaries are the ground truth, and they are native.
Installation Methods
1. Standalone Installer (What OpenAI Now Recommends First)
The README leads with this, and it is the only path that needs no package manager at all:
# macOS / Linux
curl -fsSL https://chatgpt.com/codex/install.sh | sh
# Windows
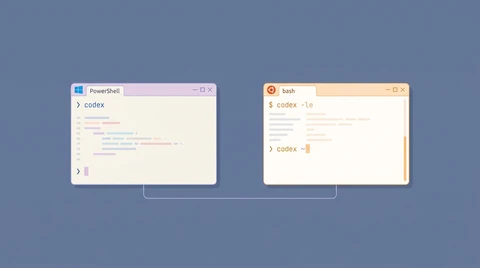
powershell -ExecutionPolicy ByPass -c "irm https://chatgpt.com/codex/install.ps1 | iex"Both URLs redirect to releases.openai.com/codex/ and return a real script — 30 KB of shell for the POSIX one, 37 KB of PowerShell for the other, verified on 2026-08-31. If the metadata or asset download from releases.openai.com fails, the installer falls back to GitHub Releases automatically. To force GitHub Releases (useful when a corporate proxy blocks one host but not the other):
curl -fsSL https://chatgpt.com/codex/install.sh | CODEX_INSTALLER_USE_RELEASES_OPENAI_COM=false shPipe-to-shell installers deserve the usual caution. Download first and read it if that is your policy — curl -fsSL https://chatgpt.com/codex/install.sh -o codex-install.sh then sh codex-install.sh.
2. npm (Still Fine, and What CI Mostly Uses)
npm install -g @openai/codex
codex --version
This is the canonical install path documented at developers.openai.com/codex/cli. It downloads the platform-appropriate Rust binary on postinstall, so the apparent “node module” is mostly a launcher. Updates go through npm:
npm install -g @openai/codex@latestIf codex: command not found after install, your global npm bin is not on PATH. Run npm prefix -g to find your global install root — the codex binary lives in <prefix>/bin — and add that directory to your shell profile.
3. Homebrew (macOS Cask)
brew install --cask codex
codex --version
The cask wraps the same Rust binary OpenAI ships on the GitHub releases page. Use this if you already manage everything else through Homebrew and do not want a Node toolchain just for one CLI. Updates: brew upgrade --cask codex.
4. Binary Release (No Toolchain)
For CI runners, restricted environments, or air-gapped boxes, grab the prebuilt binary from github.com/openai/codex/releases/latest:
- macOS Apple Silicon:
codex-aarch64-apple-darwin.tar.gz - macOS Intel:
codex-x86_64-apple-darwin.tar.gz - Linux x86_64 musl:
codex-x86_64-unknown-linux-musl.tar.gz - Linux arm64 musl:
codex-aarch64-unknown-linux-musl.tar.gz - Windows x86_64:
codex-x86_64-pc-windows-msvc.exe.zip - Windows arm64:
codex-aarch64-pc-windows-msvc.exe.zip
Unpack, drop codex into /usr/local/bin or ~/.local/bin, chmod +x, done. No Node required. The release also ships a DotSlash file named codex, which is the right choice if you want to commit a pinned executable reference to a repo and have every contributor resolve the same version regardless of platform.
First-Run Authentication
The first codex invocation prompts you to authenticate. Pick one of two paths.
Option A: Sign In With ChatGPT
codexCodex opens a browser tab, you log into ChatGPT, and the CLI receives an OAuth token cached at ~/.codex/auth.json. If you already pay for ChatGPT Plus, Pro, Business, Edu, or Enterprise, this is the cheapest path — Codex usage rides on top of your subscription up to the monthly limit OpenAI publishes for your tier.
This path does not require an API key and is the official recommendation for individual developers.
Option B: API Key
export OPENAI_API_KEY=sk-...
codex
Use this when:
- You want to route through a different provider (see “Routing Through OfoxAI” below).
- You are in CI and cannot do an interactive browser login.
- You need precise per-call billing instead of subscription usage.
The CLI also reads OPENAI_API_KEY from ~/.codex/config.toml if you prefer not to put secrets in your shell environment.
The Config File Most Quickstarts Skip
Codex looks for ~/.codex/config.toml on every run. If absent, it uses defaults. Here is a working starter file with the keys you actually need:
# ~/.codex/config.toml

model = "gpt-5.6"
approval_policy = "on-request"
sandbox_mode = "workspace-write"

[model_providers.openai]
name = "OpenAI"
base_url = "https://api.openai.com/v1"
env_key = "OPENAI_API_KEY"

[mcp_servers.filesystem]
command = "npx"
args = ["-y", "@modelcontextprotocol/server-filesystem", "/Users/you/projects"]
Three knobs to understand.
approval_policy — Three Values
untrusted— Codex asks before every shell command and every file edit. Safest, slowest.on-request— Codex auto-runs commands inside the sandbox; asks only when it wants to escape (network egress, writes outside the workspace). This is the default and the right choice for most repos.never— No prompts, ever. Pair this with a tight sandbox or accept the consequences. Note that a few 0.12x builds do not fully honorneverin MCP tool paths — verify on your version before relying on it for unattended runs.
sandbox_mode — Three Levels
read-only— Codex can read files and run no-op commands but cannot edit anything. Useful for “explain this codebase” sessions.workspace-write— Default. Edits inside the current workspace, no network, no writes outside the repo.danger-full-access— Bypasses all sandboxing. Codex canrm -rf /if it decides to. Reserve this for throwaway containers or VMs.
MCP Servers
Codex speaks the Model Context Protocol, so you can plug in filesystem servers, search tools, database connectors, and anything else from the MCP ecosystem. Each server is a [mcp_servers.NAME] table with command and args. If you have already wired MCP servers for Claude Code, the same servers work — see our Claude Code configuration guide for examples.
AGENTS.md — The Highest-Leverage File in Your Repo
Drop an AGENTS.md at the root of your project. Codex reads it on every session and treats it as persistent system-level instruction.
# Project: payments-service

- TypeScript strict mode. No `any`.
- Tests live next to source: `foo.ts` + `foo.test.ts`.
- Run `pnpm test` before suggesting a commit.
- Never touch `migrations/*.sql` — those are reviewed manually.
- DB queries go through `src/db/client.ts`. Do not import `pg` directly elsewhere.
Two practical rules:
- Keep it short — under ~150 lines. Codex reads it every turn, and a sprawling file dilutes the signal and burns context budget.
- Write rules, not lore. “Never touch migrations” is a rule. “We adopted a hexagonal architecture in 2024” is lore — put that in your README.
You can also place a ~/.codex/AGENTS.md for global rules that apply across every project (e.g., “always use double quotes in shell”, “prefer ripgrep over grep”). Project-level AGENTS.md overrides global where they conflict.
Routing Through OfoxAI (or Any Compatible Provider)
If you want to share one API key across Codex CLI, Claude Code, Cursor, and your own scripts — or if direct OpenAI billing is awkward in your region — point Codex at an OpenAI-compatible gateway.
Two env vars in your shell profile:
export OPENAI_API_KEY=<your_ofoxai_key>
export OPENAI_BASE_URL=https://api.ofox.run/v1
Or, cleaner, declare it as a named provider in ~/.codex/config.toml:
model = "openai/gpt-5.6-sol"
model_provider = "ofox"

[model_providers.ofox]
name = "OfoxAI"
base_url = "https://api.ofox.run/v1"
env_key = "OFOX_API_KEY"
Then export OFOX_API_KEY=... and your default OPENAI_API_KEY (if any) stays intact for non-Codex tools.
Why bother? Three reasons developers cite:
- One key, every model. Same key works for GPT-5.6 Sol, Claude Opus 5, Gemini 3.7 Flash, and DeepSeek V4 Pro. Useful if you swap models often. See the API aggregation overview.
- Regional reach. OfoxAI has working endpoints in places where direct
api.openai.comis intermittent. - Cost shape. Pay-per-token across providers instead of per-vendor subscriptions. The cost reduction guide covers the math.
For the deeper routing setup (env vs config, model prefixes, billing dashboard), see our Codex CLI API configuration guide.
Verifying the Install
Quick smoke test sequence:
# 1. CLI is on PATH
codex --version

# 2. Auth is wired
codex login status

# 3. Sandbox works
cd /tmp && mkdir codex-test && cd codex-test
codex "create a Python script that prints fibonacci numbers up to 100"
ls -la
If codex login status reports “Not logged in” after you already authenticated, your ~/.codex/auth.json is missing or unreadable — usually a permissions issue after running codex once as root then again as your user.
Updating and Uninstalling
Update:
codex update                                 # works regardless of install path
npm install -g @openai/codex@latest          # npm path
brew upgrade --cask codex                    # Homebrew path
codex update is a first-class subcommand now, so you no longer have to remember which package manager put the binary there.
Pin a version (recommended for CI):
npm install -g @openai/codex@0.151.0Releases move fast — 0.151.0 landed 2026-08-29 and there was already a 0.152.0 alpha on npm the same week. Pin in CI, float on your laptop.
Uninstall:
npm uninstall -g @openai/codex
rm -rf ~/.codex                              # removes auth, config, history
The ~/.codex directory holds your auth token, config, session history, and any cached MCP server state. Delete it only if you want a clean slate.
Troubleshooting the First Hour
“Command not found: codex” — npm global bin not on PATH. Run npm prefix -g and add <that path>/bin to your shell profile (npm bin -g was removed in npm 9+).
Anything wrong and you are not sure what — run codex doctor. It checks the local installation, config, auth, and runtime health in one pass, which is faster than guessing from a stack trace.
“Cannot find module …” on first run — a partial npm install, usually a failed optional-dependency download behind a proxy. Reinstall with npm install -g @openai/codex --force, or switch to the standalone installer, which fetches a single binary and skips the whole optional-dependency mechanism.
Browser auth loop — Your default browser is not opening the OpenAI consent page. Run codex login --device-auth to switch to the OAuth device-code flow: Codex prints a URL and a one-time code you paste into any browser (including one on a different machine), no local browser handoff required.
Invalid API key after switching providers — OPENAI_API_KEY still points at OpenAI but OPENAI_BASE_URL points at OfoxAI (or vice versa). Both env vars must match the same provider, or use the named [model_providers.X] config to avoid the conflict entirely.
Model not found errors — When routing through a non-OpenAI provider, model IDs need a vendor prefix. Use openai/gpt-5.6-sol instead of gpt-5.6-sol. The same applies if you point Codex at non-OpenAI models like Claude or Gemini through the gateway.
approval_policy ignored — there is a history of bugs around approval policy and sandbox enforcement. The 0.151.0 notes list fixes for exactly this class of problem. Update before you debug, and report regressions upstream rather than disabling the sandbox to work around them.
What to Do Next
You have a working Codex CLI. A few follow-ups worth reading:
- Daily workflow — Codex CLI real-world coding workflow covers the AGENTS.md + plan-mode + git-worktree loop senior devs use day to day.
- Model picking — the default follows whatever your Codex build ships, but your task may want a different model. The model comparison guide frames the GPT vs Claude vs Gemini decision.
- Multi-tool setup — If you also run Cursor, Cline, or Claude Code, the unified custom API setup guide shows how to wire all four against one gateway.
- Other surfaces — The CLI is not the only client. The Codex Chrome extension and desktop app cover the browser side, and Codex Mobile covers driving a connected Mac from a phone.
- When it stops accepting work — A clean install still hits the plan cap. Codex reset: when your weekly limit clears covers the rolling window, what
/statusactually reports, and how to redeem a banked reset.
The one thing every Codex quickstart skips: the dangerous default is not sandbox_mode = "danger-full-access" — that one is at least honest. The dangerous default is leaving OPENAI_API_KEY exported in your shell while you run codex in a repo whose AGENTS.md says “feel free to read secrets from .env to debug things.” Treat the install as the first ten percent of the setup; the config file and the AGENTS.md are the other ninety.
If the install finishes and Codex still will not start, the Codex error index maps the message you are seeing to its actual cause.
Frequently Asked Questions
- What is the minimum Node.js version for Codex CLI?
- There is no longer a high floor:
@openai/codex0.151.0 declaresengines.node: ">=16". The core is a Rust binary and npm is only the wrapper, so Node matters solely for the npm install path. The standalone installer (install.sh/install.ps1) needs no Node at all. - Can I use Codex CLI without paying OpenAI per token?
- Yes. Sign in with a ChatGPT Plus, Pro, Business, Edu, or Enterprise account and your subscription covers Codex usage. Or set
OPENAI_BASE_URLto a compatible provider and pay per token there. - What is AGENTS.md and where does it go?
- A plain-text file at the root of your repository (and optionally at
~/.codex/AGENTS.mdfor global rules). Codex reads it on every session for persistent instructions — coding standards, files to avoid, build commands. Keep it under ~150 lines so the signal does not get buried. - Why does
approval_policy = "never"still prompt me sometimes? - Certain MCP tool paths and shell commands have historically bypassed the setting, in the CLI and in the VS Code Codex extension. The 0.151.0 release notes list fixes in this area (restored permission profiles across TUI turns,
/cdno longer weakening sandbox restrictions), so update first, then prefersandbox_mode = "workspace-write"if you need a stronger guarantee than approval policy alone.